Create and manage Groups and Items
What are Groups and Items and how are they used
iovox provides powerful insights through your call activity. Each business is unique and your setup is dependent on how you want to track your activity.
Groups and Items allow you to define and organise everything related to your iovox Numbers and Analytics.
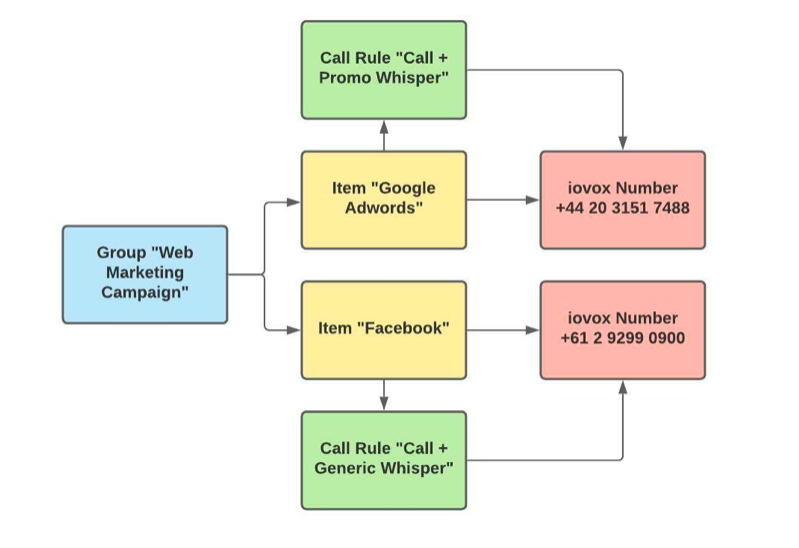
Group: A Group, formerly known as “Node”, is the family of Items that you want to track. A Group can gather an unlimited number of Items.
For instance, you’ve launched a marketing campaign which includes channels.
The Group will be at the campaign level and each marketing channel will correspond to an Item.
Item: The Item formerly known as “Link”, is the identity of a specific Number inside your account. It defines what is happening any time a call occurs inside your account.
For instance, you may want to create an Item for each marketing channel to know which is the most efficient etc.
How to create and manage my Items
To create a new Item, go to the “Items” page
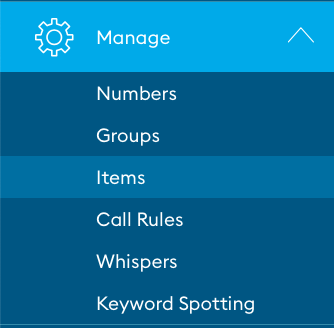
Click on “+ item”

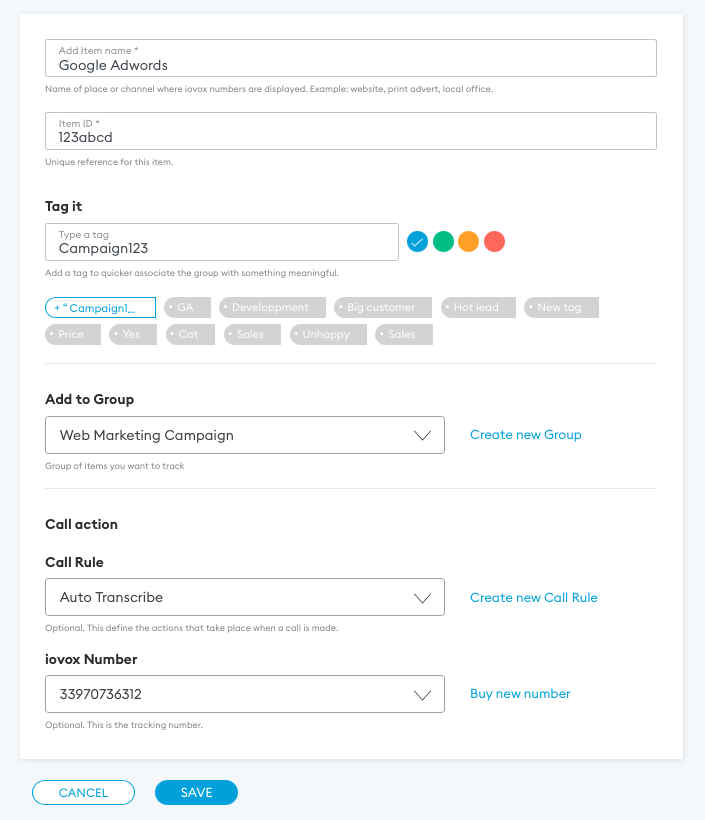
All Items require a Group, you can use the Default Group or create a new one. Groups can exist without Tags, iovox Numbers or Call Rules, which can all be assigned later.
Items can have:
- A Name – it describes what you are tracking with this number (e.g. “Google Adwords”)
- An ID – This ID is unique and may help you cross reference with your own tools or you can use it for our API services
- Tag(s) – Tags appear in the Analytics and allow you to easily identify and search for something (e.g. “$1000” etc.)
- A Group – An item can only belong to a single Group
- A Call Rule – The Call Rule that decides what happens when the Number is called, is assigned to the Item
- An iovox Number – Only one iovox Number can be connected to an Item
Once Items have been created, they are all available from the Items page.

- You can update them by clicking on the pen icon from the row of the Item you want to update

- You can delete them by clicking on the bin icon from the row of the Item you want to update

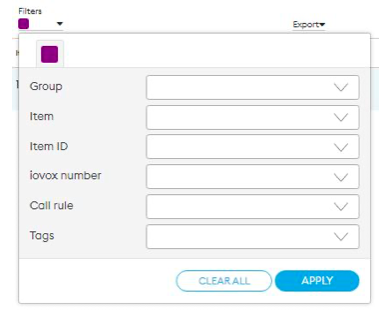
- You can filter them if you’re looking for specific Items in the list
- You can export the table by clicking on “Export”

- You can use the filters to only show some of the Items in the list
How to create and manage Groups
To create a new Group, go to the “Groups” page
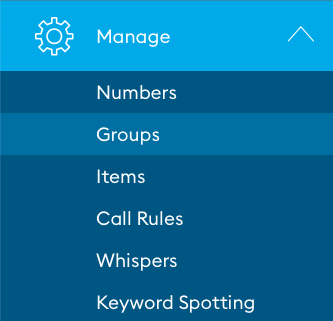
Click on “+ group”

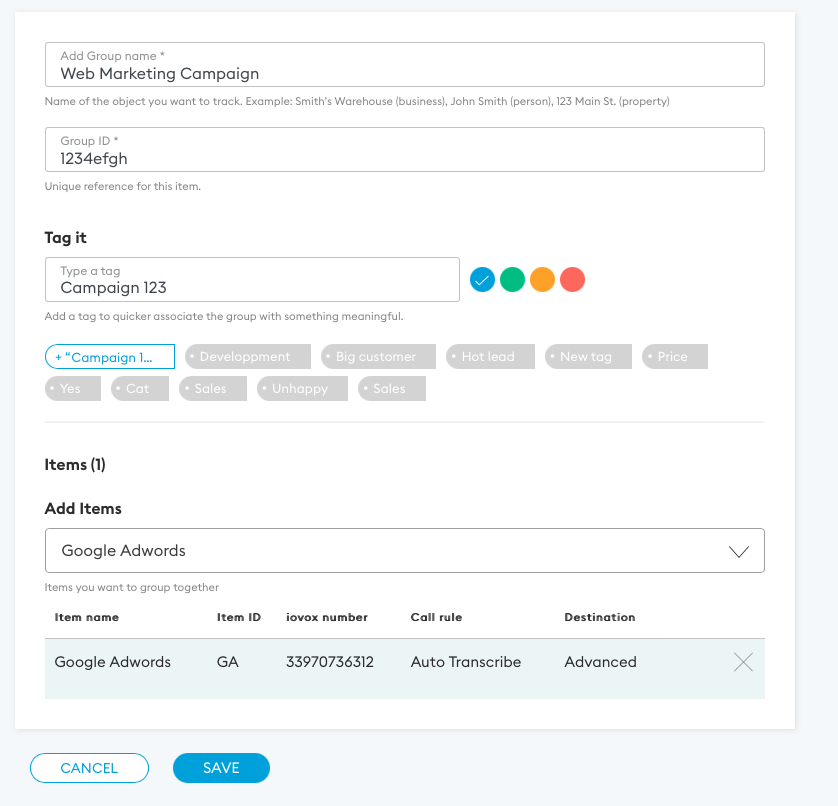
The Group has:
- A Name – the name you choose should describe the collection of Items (e.g. “web Marketing Campaign 5”)
- An ID – This ID is unique and may help you cross reference with your own tools or you can use it for our API services
- Tag(s) – Tags appear in the Analytics and allow you to easily identify and search for something (e.g. “September Campaign”)
- Item(s) – An unlimited number of Items can be assigned to a Group – use the dropdown menu to select an existing Item
Once Groups have been created, they are all available from the Groups page.

- You can update them by clicking on the pen icon from the row of the Group you want to update

- You can delete them by clicking on the bin icon from the row of the Group you want to update

- You can filter them if you’re looking for specific Groups in the list
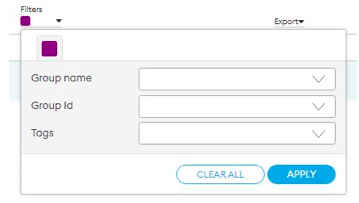
- You can export the table by clicking on “Export”

- You can use the filters to only show some of the Groups in the list
How to apply an Item from the iovox Numbers page
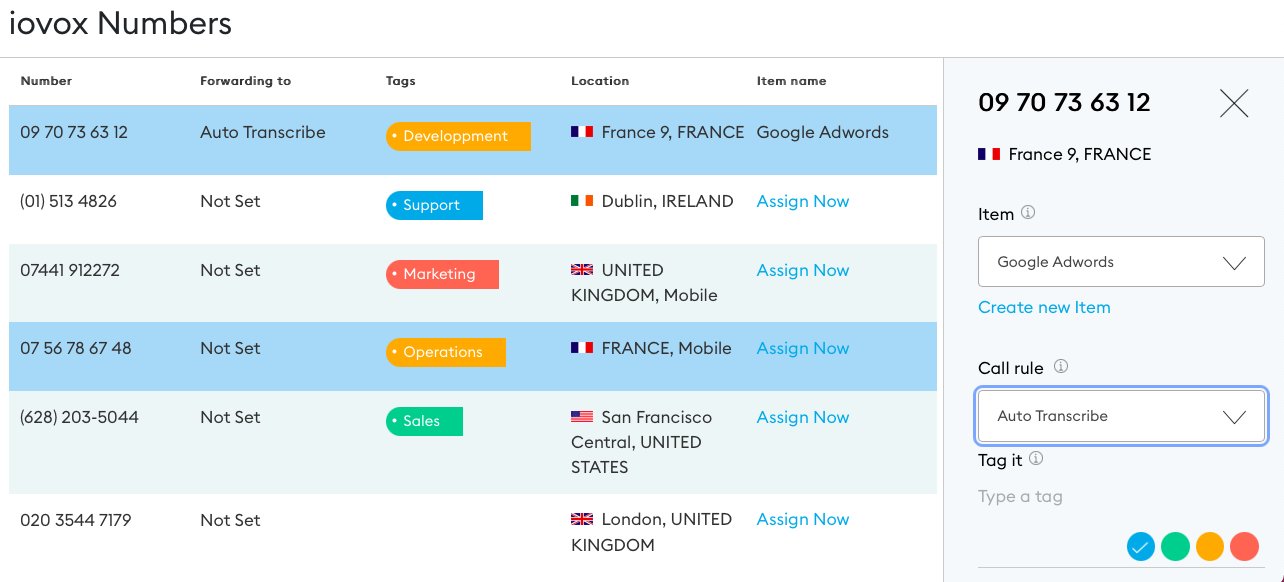
Similarly to how you can add an Item to a Group from both the Items and the Groups pages, it is possible also to apply an Item from the iovox Numbers page.
To do so, go to the iovox Numbers page
On the left side of the page, select an iovox Number's row
- From the side menu, select the Item using the dropdown menu
- Once the Item is applied, you can also apply a Call Rule (an Item must be applied first and then you can apply a Call Rule)
 iovox, Web, Groups
Contact our team today to explore our products and solutions
Contact Us
Send us a message and someone from our team will contact you ASAP.
Or call us on +44 20 7099 1070